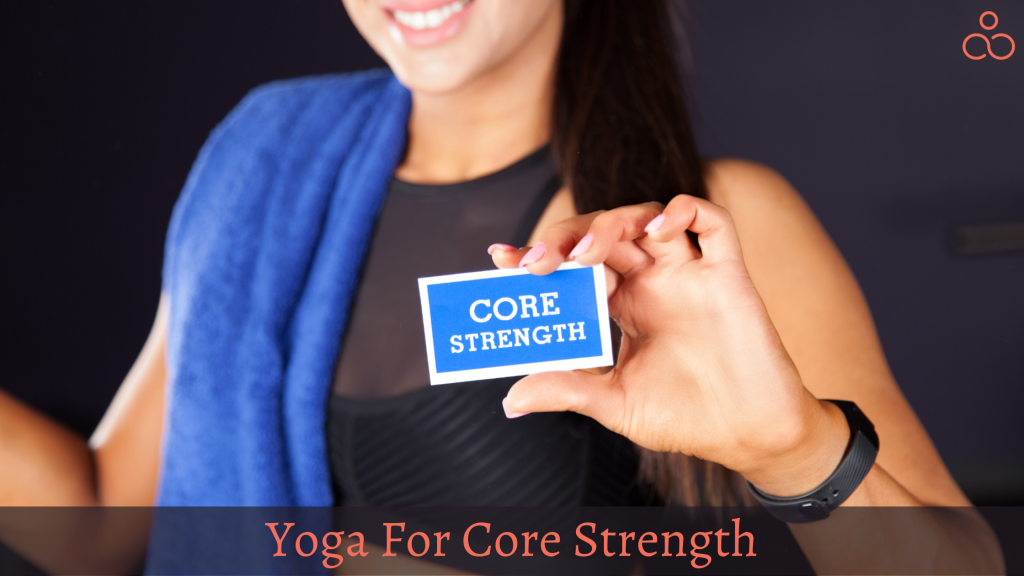
Are you looking forward to strengthening and toning up your core? Yay, then you are at the right place. Don’t worry if you are not able to hit the gym regularly. Yoga can be your best friend and help you achieve your desired goal from the comfort of your home. We have compiled a list of yoga poses for core strength for you irrespective of your level of expertise – Beginner, Intermediate or Advanced. So, do not wait longer and kick start your practice about Yoga for core strength.
Beginner Poses
For those interested in strengthening your core with yoga but who do not know where to begin, the following poses could be a good start for you:
Plank Pose or Phalakasana
Start this pose by kneeling and placing your hands in front of you on the ground. Straighten your arms and make sure they are shoulder-width apart. Slowly untuck your legs and stand on your toes. Make sure your body is in a straight line.

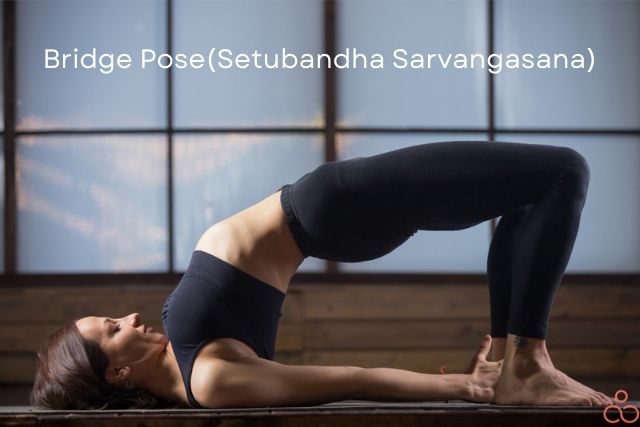
Bridge Pose or Setu Bandha Sarvangasana
To begin the Bridge pose, lay down flat on your back. Bend your knees with your feet on the ground. Move your hips and back up towards the ceiling but keep your arms horizontal on the mat. Stay in this pose for 30 seconds to a couple of minutes.
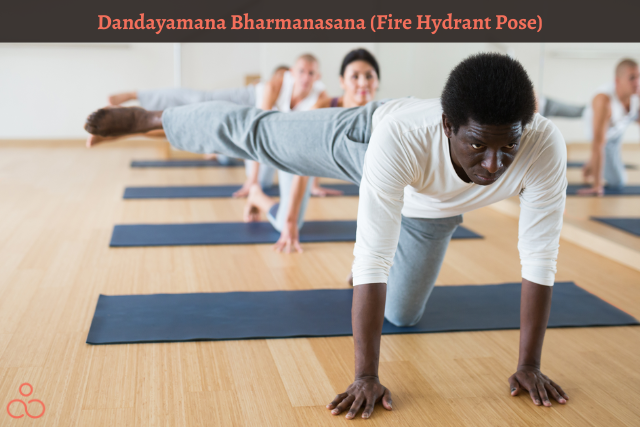
Fire Hydrant Pose or Dandayamana Bharmanasana
First, get on your hands and knees on a flat surface, and lift one leg parallel to your body with the knee still bent. Hold this leg up anywhere between 0.5 to several minutes. Afterward, switch back to your first position on your hands and knees. Lift the opposite leg for the same length of time.
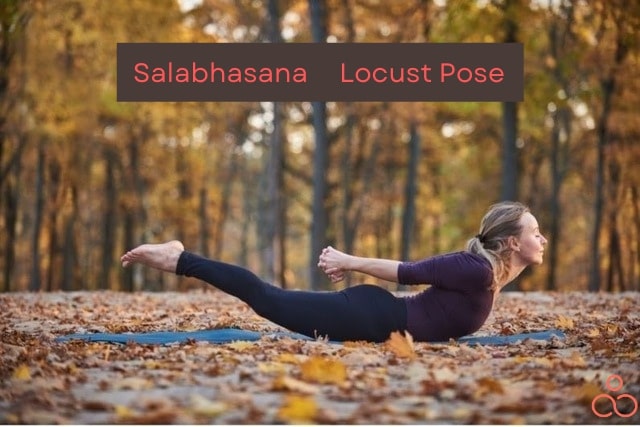
Locust or Salabhasana
Begin by lying flat on your stomach. Then lift your legs and arms behind you.
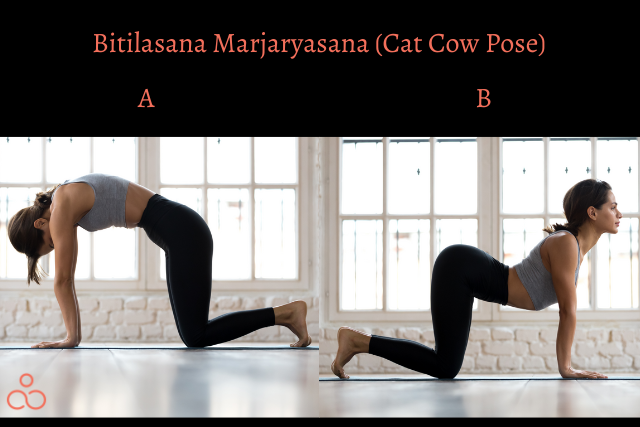
Cat-Cow Pose or Bitilasana-Marjaryasana
Start with your hands and knees a shoulder-width apart. From there, you go between making an upward arch (like a bowed-up cat) and getting your stomach as close to the ground as you can. You should repeat these back to back while still allowing yourself to stretch.
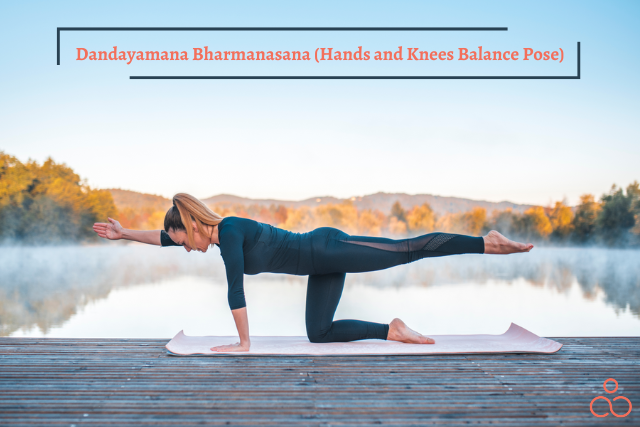
Hands and Knees Balance Pose or Dandayamana Bharmanasana
You start this position on your hands and knees. Keep your hands in front of your shoulders, and your knees are under your hips. From there, you raise one arm in front of you to shoulder level. At the same time, raise the opposite leg with a flexed foot. Hold that position for 30 seconds before switching sides.
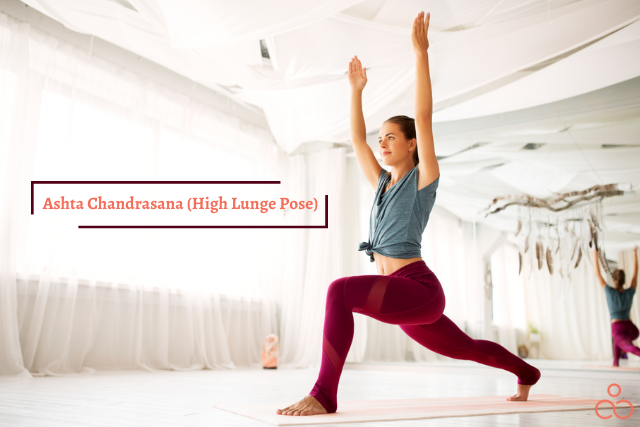
High Lunge Pose or Ashta Chandrasana
Find yourself in a comfortable lunge position and make sure your front leg is at 90 degrees. From there, you need to straighten your back leg. You may need to brace on the floor to get to this step, but that is okay. Once you get it, raise your arms above your head and hold the position. Switch your front and back legs after that.
Chair Pose or Utkatasana
While standing, slowly start bending your news so it appears like you are squatting. Try your best to get your thighs parallel to the floor, almost like you are sitting in a chair. You will have to lean forward some for this, do not try to keep your back straight. With a slight bend in your back, reach up. Hold this pose for however long you can.

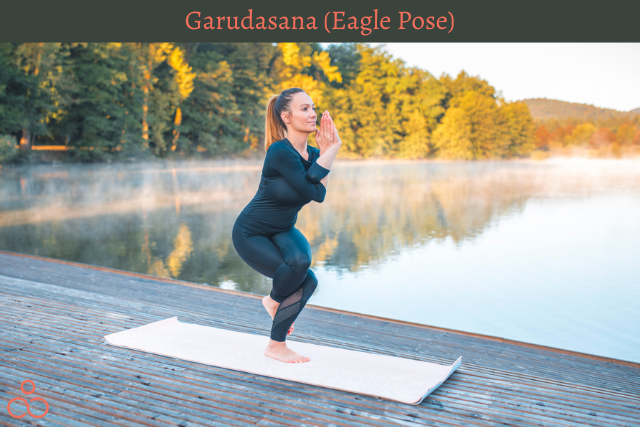
Eagle Pose or Garudasana
Start by standing flat on your feet, cross one leg in front of the other, lifting it higher than the other. Keep your gaze forward, back straight, and hips squared. Draw in your stomach and cross your arms in front of you with your hands pointed up. Keep your arms close to your shoulders as you do this. Hold this pose for a few minutes before switching sides.
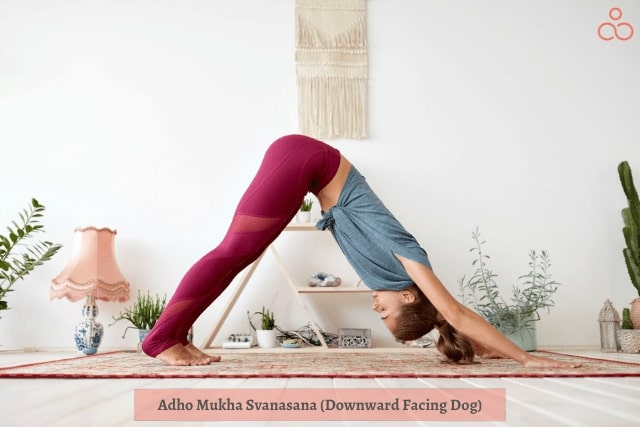
Downward Dog Pose or Adho Mukha Svanasana
Start on your hands and feet, your arms should be under your shoulders, and your feet should be near the edge of your mat. This is a wide pose so you will need a bit of space. From there, lift your hips as high as you can and your body should make a triangle-like shape. Take a few breaths before moving.
Intermediate Poses
If you are finding that the beginning poses are not giving you any difficulty, then it is time to move up to the intermediate level. Here are some of the intermediate poses:
Side Plank or Vasishthasana
Begin with a normal plank pose. Lean your body towards one side, lift one arm into the air, and keep your ankles together. You should be balancing on one of your hands and the side of your foot. Remember to switch sides for optimal benefits.

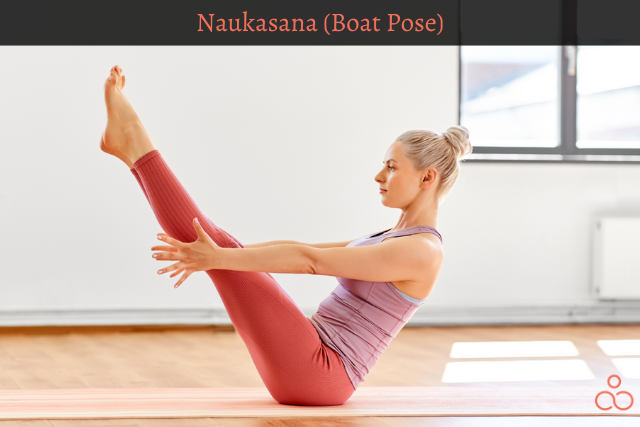
Boat Pose or Naukasana
Begin by sitting down on the ground. Lift your legs up and straight. Grab your legs but keep your arms and legs straight. This pose is also known as Navasana.
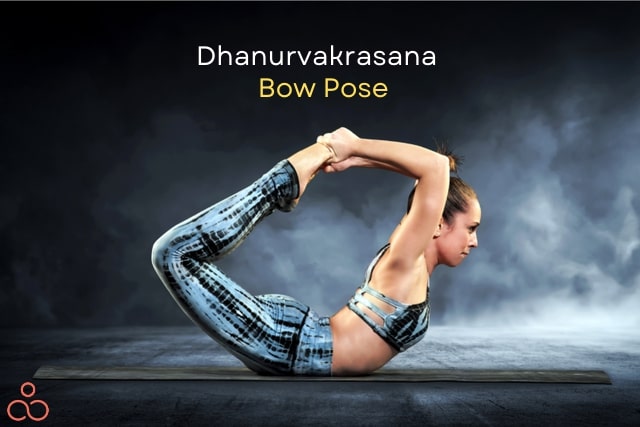
Bow Pose or Dhanurasana
Lay flat on your stomach. Slowly reach up behind you and grab your ankles. This should cause a slight arch in your back, just embrace it. Hold it for a few breaths before releasing.
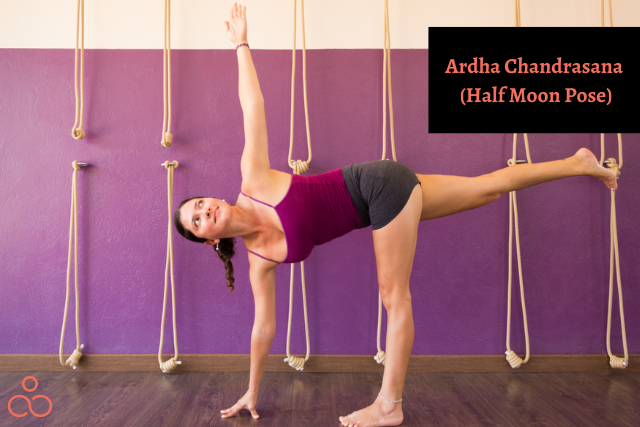
Half Moon Pose or Ardha Chandrasana
To begin the Half Moon pose, stand flat on your feet. Lean towards one side until your hand touches the floor. Lift the opposite arm straight into the air and your legs parallel to your body. Hold for a couple of minutes, then switch.
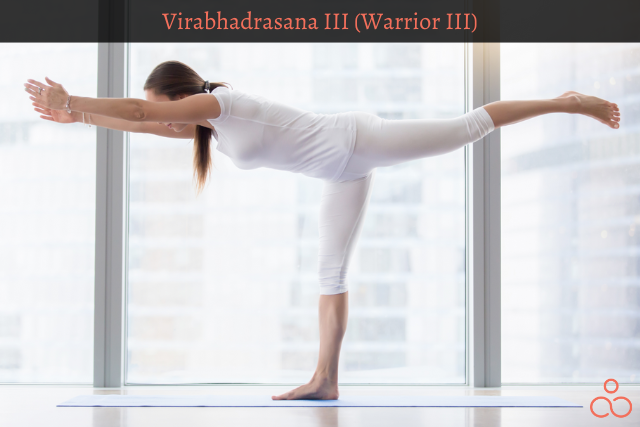
Warrior 3 Pose or Virabhadrasana III
Start this pose by standing up. Slowly raise one leg behind you, keeping the foot flexed. As you do that, you are going to lean your upper body down with your arms extended above your head. The goal is to have the extended leg and your upper body in a continuous line. Hold this pose for however long you feel it’s necessary before switching which leg you extend.
Advanced Poses
Beware, these poses are a lot more difficult than the previous poses. Do not do these poses unless you are highly experienced and confident in your abilities. If you start to feel discomfort or pain, stop immediately and switch to an easier pose.
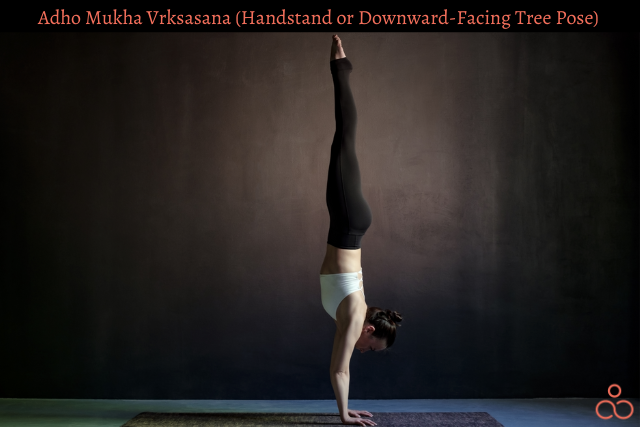
Handstand or Downward-Facing Tree Pose or Adho Mukha Vrksasana
To reduce the risk of injuries, practice this pose against a wall until you can balance yourself without it. Prepare yourself in a down dog pose. When you are ready, take a breath and jump, aiming for your heels to kick your glutes. Engage your core to keep you steady. It’s most likely going to take a few tries before you get it and that is okay!
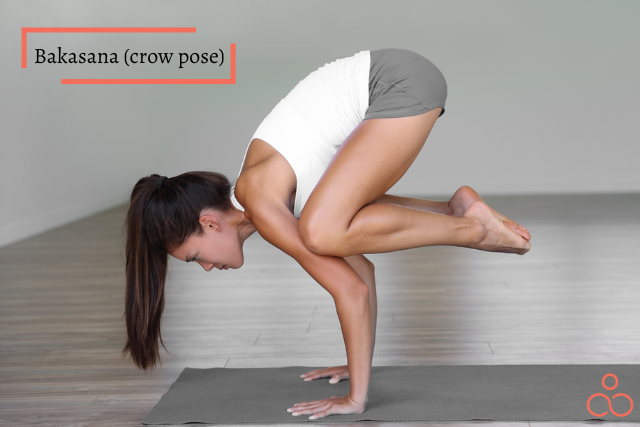
Crow pose or Bakasana
Start with your hands flat on the floor, shoulder-width apart. Your feet should be about a foot behind them. Stand on the balls of your feet and gently place your knees on the back of your forearms. Very slowly shift the weight to the front as you take your feet off of the ground. Take a few breaths before lowering yourself back down.
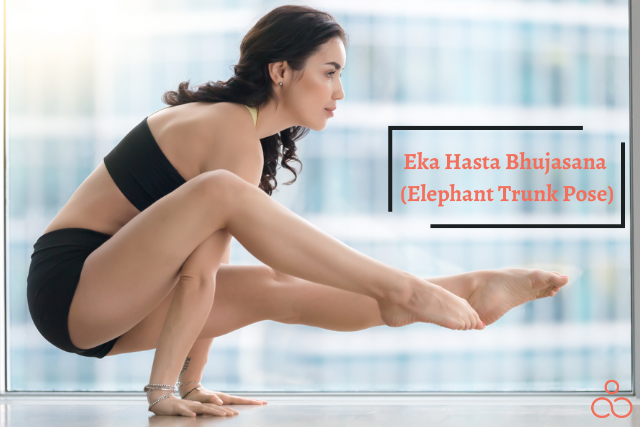
Elephant Trunk Pose or Eka Hasta Bhujasana
Start by sitting down in a cross-legged position with one hand in the middle of your leg and one on the outside. Pick up the same-sided leg (This is in reference to the arm inside of your legs) and place the thigh on the top part of the arm. From there, all you need to do is lift yourself up and extend the remaining leg.
FAQ
What are core muscles?
Core muscles are a group of muscles around your abdomen, spine, trunk, and hip. These muscles play a vital role in maintaining a proper body balance and posture. They protect the spine from all the excessive load and can prevent injuries to a large extent.
What are the signs of a weak core?
It could be quite easy to find out that you are having a bad core or pretty soon gonna develop it. Some of the symptoms that you must watch out are:
- Poor posture
- Lower back pain
- Difficulty standing for long periods
- Feeling strenuous to get up or sit down
- Weakness in the upper body
- Saggy or bulging stomach
- Lack of stability in lower body
- Difficulty with everyday tasks
Can yoga help me in strengthening my core?
Though yoga seems to be a gentle and subtle form of fitness, it is a lot more engaging on the inside of your body. We would like to say that almost every pose in yoga is likely to work on your core and the transition from one pose to another requires your body to have a great stability which again is a part of having a great core. Therefore, yoga would be the best tool for strengthening your core and toning your abs.
Conclusion
No matter if you have just started yoga or are a pro, there is always going to be a type of pose that is perfect for your expertise level. Remember, you need to take this process slowly and listen to your body, you can get seriously hurt if you do not listen.
