Medical parts were written by Dr. Mishra
It’s time to get out your yoga mat and uncover the unique combination of physical and mental activities that have enthralled yoga practitioners all over the world for thousands of years. Yoga’s elegance is that you don’t have to be a yogi or yogini to experience its positivity. Yoga can calm the mind and strengthen the body, whether young or old, chubby or fit. Don’t be put off by yoga terminology, pricey yoga studios, or challenging poses. One such pose you can try is Downward Facing Dog. Everyone can benefit from this pose. You’ve already heard that Downward Facing Dog is beneficial to your fitness. Perhaps you’ve even tried it and found that it helps you feel better. Trying this pose has many mental and physical health benefits. Some benefits, such as increased versatility, are immediately noticeable.
Downward-Facing Dog Pose, also known as Adho Mukha Svanasana in Sanskrit, is a famous yoga pose that strengthens the core and improves circulation. This energizing pose provides a delicious, full-body massage.
Downward Facing Dog is a full-body stretch that opens up the backline and is relaxing and energizing. Adho Mukha Svanasana resembles how a dog appears when it bends over.
As a beginner, you can focus on learning Downward Facing Dog Pose. A Downward Dog a day, they claim, keeps the doctor away. This asana has a plethora of incredible benefits that make it imperative that you perform it daily. The best part is that even a complete novice can master this asana with ease.
Steps To Do Downward Facing Dog Pose
This pose can be done anywhere a yoga mat can be laid out. Downward Facing Dog, when done correctly, will provide a delicious stretch to your entire body. This yoga pose reinforces your arms and legs while also assisting you in bringing energy to your whole body. However, downward Facing Dog’s advantages are also negated when done without the knowledge of alignment, as it can irritate wrists and tight back muscles.
It is why it’s crucial to learn how to adapt the Downward Facing Dog pose to fit your needs. Remember that yoga asanas are about function rather than shape and that everyone’s Downdog can vary slightly based on their anatomical and physiological limits.
- Begin in Child’s Pose, with your toes tucked under and your arms fully extended in front of you. Hold the Child’s pose, then diagonally push your pelvis upwards until your body forms an inverted V shape.
- Bend your knees as much as you need to, and don’t stress if your heels don’t hit the floor. This isn’t the point of this pose! The aim is to raise your sit bones and open up the back of your body and the area around your shoulders. When they’re ready, the heel will come right down.
- Start with your hands to check your alignment. Push down through the mound of your index and thumb with your fingers spread wide. Make sure your wrists aren’t flexed to 90 degrees and that you’re pushing your weight up and back to relieve pressure on your wrists.
- To find space around your upper back and chest, try externally rotating your upper arms. Your forearms should feel like they’re pushing against each other. Working your shoulder blades down your spine and then around to the side ribs is an excellent way to start.
- Work your way up to your spine, lengthening the space between your vertebrae as you go. Make sure your pelvis is turned forward as you hit it to help raise your sit bones higher. It could help if you picture your pelvis as a bowl of water from which you’re almost spilling water on the concrete.
- To engage your thighs, hug your thigh muscles to the thigh bones. Next, pull the thigh bones up into the sockets of your hips. From within, rotate your thighs while keeping your feet straight ahead and in line with your hips’ width. Your gaze should be your navel or your knees while doing downward dog.
- Keep your abdomen stimulated but soft by hollowing out your midsection but not holding your breath. Finally, if your feet are flat on the floor, raise your toes for a few breaths before lowering them.
And although Adho Mukha Svanasana (aka Downward Dog) is in pretty much every yoga session, right from the first lesson you go to, it is anything but a simple pose. I am constantly grappling with Downward-Facing Dog — and I have been practicing yoga for more than a decade!
The most challenging aspect of this pose for me is that no matter how hard I try to lengthen my hamstrings, they remain tight. In Down Dog, this causes my lower back to round, so it feels like I’m still trying to find the natural curves of my spine.
Maintaining spine length is more critical than maintaining straight legs. So if you find yourself cracking your back or slouching your shoulders, it’s okay to keep your knees bent as often as you need to savor the flexibility in your back. Also, remember that your heels don’t have to touch the ground!
Start with this position – For Beginners:
You can practice the pose against a wall to improve it. Stand about a meter/3 feet away from the wall, with your legs hip-length apart. Put your hands up against the wall and use the same arm rotation as in the steps above. Next, move your arms and torso down the wall until they are parallel to the ground.
WHICH JOINTS ARE STIMULATED WHILE DOING DOWNWARD DOG POSE?
Let’s start by looking at how your joints move in this asana. A lot is going on in the joints of the upper limbs when the spine is in axial extension: raising and upward movement of the scapulae (shoulder blades).
- Shoulder flexion is a term that refers to the movement of the shoulder blades
- The elbows are extended
- The forearms are pronated
- Wrist dorsiflexion is a term used to describe the action of bending the wrists backward.
The spinal extensors and flexor muscles are the key players in Downward Dog because they help you keep your spine aligned. There are also many engaged in the upper limbs to assist you in maintaining your alignment.
It strengthens your arms, neck, and legs while stretching your hamstrings, shoulders, calves, arches, hands, and back. This pose is classified as a mild inversion since your heart is higher than your head.
It provides all of the advantages of inversions: Headaches, insomnia, exhaustion, and slight depression are all mitigated. Blood flow to the brain also helps relax the nervous system, enhance brain function, and reduce stress.
Cautions Before Practicing This Pose:
If you have severe carpal tunnel syndrome or are pregnant in the third trimester, avoid Downward-Facing Dog.
Those with back, arm, or shoulder injuries and those with high blood pressure, eye, or inner ear infections should avoid it. Always stay within your capabilities and boundaries. Before doing yoga, consult your doctor if you have any medical problems.
Look Out For These Common Mistakes While Performing:
- The most common mistake beginners make in Downward Facing Dog is not releasing their heels towards the ground. The direction of the pose moves forward instead of the back while you’re on the balls of your feet. If you don’t put your weight back into your shoes, it won’t be a resting spot. It does not imply that the heels must be touching the ground; instead, they must be traveling in that direction. With continuous practice and assistance, one can surely master this pose.
- Bend your knees and come up onto the balls of your feet for a minute to get your bottom in the right place. Bring your sit bones up high and your belly to rest on your thighs. Then, while maintaining the high outward rotation of the sit bones, drop your heels and straighten your legs. Spread your fingertips and bring your hands marginally forward of your shoulders, with your middle finger attempting to point forward.
- If you are flexible enough, avoid allowing your rib cage to sag into the floor, resulting in sinking your spine, also known as a banana back. Instead, maintain a flat back by drawing the ribs in.
- To get a good grip, spread your fingers out. Don’t dismiss the abilities of each of your fingers, particularly your thumb and index fingers. They appear to be strong supporters of this asana.
- The gap between the feet may be an issue as well. Students sometimes take them too broadly, near the mat’s edge, or too short, touching each other. Instead, your feet should be hip-width apart, leaving about 6 inches (15cm) of space between them, based on your height. Again, you’ll have a strong base for this pose if you set up your feet right, release your heels, and hold your buttocks high.
Remember:
- Often, keep an eye on the space between your hands: if it is broader than the distance between your elbows, this will trigger neck and shoulder tension. Instead, to find independence, extend your shoulders.
- Your Downward-Facing Dog would be bunched up, with very little space between your hands and legs, if your hamstring muscles are stiff and you want to hit the floor with your heels. This will cause the lower back to round and place pressure on it. So instead, wake up with Reclining Hand-to-Big-Toe Pose to comfortably lengthen the hamstrings, then practice Down Dog with bent knees.
- Do not hold your hands out. When you do this, you risk destabilizing your hands when friction is applied to the outside wrists.
- If your hands fall out of this place, you risk injuring your face. Wet your palms with 2-3 drops of water for better grip.
- If you have tight hips, Use these blocks under your foot to lend yourself some additional height and relieve stress on your hips. You may also use a block to help support the forehead.
Modified Downward Dog Pose
For Beginners:
If your hamstrings are incredibly tight, you may not be able to hold your buttocks high while still straightening your legs. If that’s the case, a slight bend in your knees is appropriate. With regular practice of other poses, the hamstrings can lengthen over time.
To do a therapeutic version of the pose, put a yoga block under your head. You may also put a block under your hands or a rolled towel under your wrists for extra comfort.
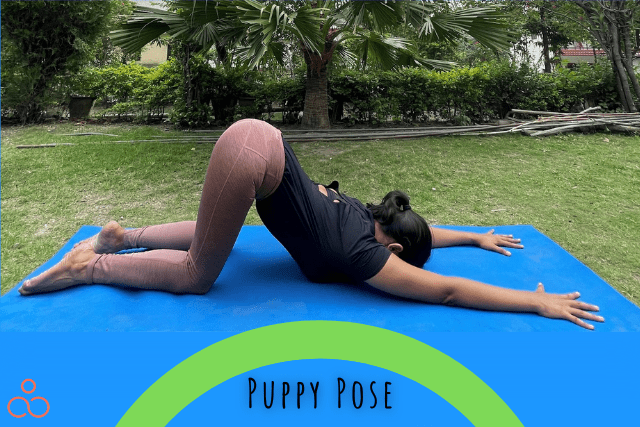
Try The Puppy Dog Pose:
The puppy pose is a gentle backbend that combines the downward-facing dog with a child’s pose.
- Your hips should be directly over your knee caps, and your shoulders should be directly over your wrists. Toes gesturing straight back, place the tops of your feet on the mat. Maintain a hip-width distance between your feet.
- Begin walking your hands out in front of you as you exhale. As you slowly release your forehead to the floor, enable your chest to melt toward the floor.
- Spread your fingers out and firmly press your thumb and index fingers together.
- To widen your shoulders, roll your upper arm bones outward away from your ears. As your forearms spin up toward the ceiling, feel your triceps wrap down toward the mat’s outer rim. Lift your elbows slightly off the mat and keep your arms active.
- Deepen the extension by attaining your hips up and back towards the wall behind you on your next breath; in the meantime, continue to let your chest melt downward.
- Inhale deeply and hold the stretch for 5–10 breaths.
- Return your hands to the Tabletop position to exit the pose.
Remember:
Allowing the front ribs to stick out dramatically and/or allowing the knees to spread wider than the hips is not a good idea. The lower back may be compressed as a result of this.
Allowing your elbows to splay out and your shoulders to roll inward is not a good idea. Your neck and shoulders may become tense as a result of this.
Up For A Challenge?
Once you’ve mastered the fundamentals, here’s how you can ramp up your practice and make it more efficient.
- Increase the stretch by raising your body off the floor with your toes and bringing your hips up higher. Remember to move the pelvis inwards. Maintain the pressure by lowering your heels to the floor.
- To maximize the strength of your attention on your muscles, loop a belt around them and push against the belt’s strap. Next, position the belt above your knees on the upper portion of your legs to concentrate on your legs, and then focus on the leg by pulling the thighs outward.
Staying in this pose for a while when you’re exhausted will help you regain your energy. It can make your legs stronger and shape your legs, as well as relieve shoulder pain and slow your heart rate.
Wrapping Up!
The Adho Mukha Svanasana is known for its muscle-relaxing properties. The effort to pull the hands apart in this position increases the tension in the muscle tendons and the spinal cord response by signaling the muscles to relax. As a result of the stretching in this pose, it helps to calm the body and mind. Because everyone’s body is different, there aren’t always specific instructions. Listen to your very own body as much as possible. It would help if you found the right balance between increasing your flexibility while avoiding injury or becoming demotivated.
If you are interested in Backbend Poses, check out this article.
