
Yoga has advantages for all climbers, regardless of whether they like to boulder in a gym or climb on natural crags. Yoga may assist you in acquiring all of the necessary abilities and traits that climbers require, from muscular fitness to mental discipline, which is why it pairs well with climbing. A few of the simplest methods to get better at rock climbing is through yoga. Along with increasing flexibility, yoga for climbers also fosters balance, strengthens muscles, reduces stress, aids in preventing injuries, and educates you on how to be aware of your body.
10 Preparatory Yoga Poses for Climbers
Yoga teaches you to focus just on your breath while letting everything else go. Your brain and body can concentrate on movement and improve intuition this way. You can say farewell to stiff hips and hamstrings and say hello to knee hooks and elevated feet by including these ten positions in your everyday practice!
Bharmanasana (Table Top Pose): Start on all fours with your knee under your hips and your hands just beneath your shoulders. As your fingers point back toward your knees, slowly start to twist your hands outward. You can turn your fingertips toward the mat’s outer edges if this seems too intense. 10 breaths should be held. If you want to make the stretch more intense, slowly nudge your hips toward your heels.
Why it’s ideal for climbers: This posture improves your wrists, arms, and shoulders while lengthening and realigning your spine.
Virasana (Hero’s Pose): To sit up on your heels and enable your toes and arches to stretch, start at the Tabletop. Tuck your toes under and walk slowly your hands back toward your knees. You may take some of the pressure off of your heels if it seems too much by resting your hands on the mat. 10 breaths should be held.
Why it’s ideal for climbers: This posture strengthens and stretches the arches of your feet and ankles, which helps you become more flexible in your hips, thighs, knees, ankles, and feet while also increasing blood flow in your legs. To compensate for wearing those little shoes, climbers should do this every day!
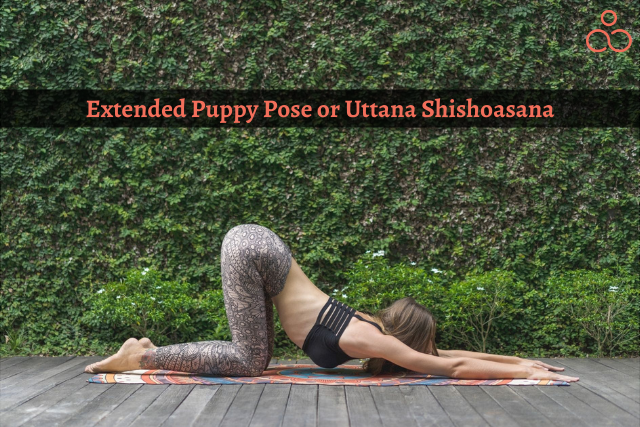
Uttana Shishosana (Extended Puppy Pose): Start in tabletop position by placing both ankles on the carpet with their tops facing backward. Keep your hips exactly above your knees and slowly start to move both arms out in front of you. At the same time, softly drop your forehead to the mat and drop your chest towards the floor. Lower your head to the mat to make the stretch more pronounced. Put your head, chest, or both on a matted blanket if you want to reduce the intensity. Develop flexibility in your spine with each inhalation. Bring your chest nearer to the floor with each exhalation. 10 breaths should be held.
Why it’s ideal for climbers: This posture extends your spine, shoulders, upper back, arms, and abdominal muscles, which is why it’s perfect for climbers.
Vrishikasana (Scorpion Stretch): Start by lying on your stomach with your arms outstretched, making a “T,” and your palms facing down. Your left hand should be held palm downwards in front of the face while you bring your right-hand side of the face to the mat. Step back with your left foot, bend your left knee, and place your foot sole—or the entire foot—on the ground. Feel the stretching in your shoulder and chest as you continue to push your left hand or fingers into the mat. 10 breaths should be held. On the opposite side, repeat.
Why it’s ideal for climbers: Your chest muscles, shoulders, and arms are stretched in this position. Additionally, the twisting motion stimulates the organs in your abdomen and aids in digestion.
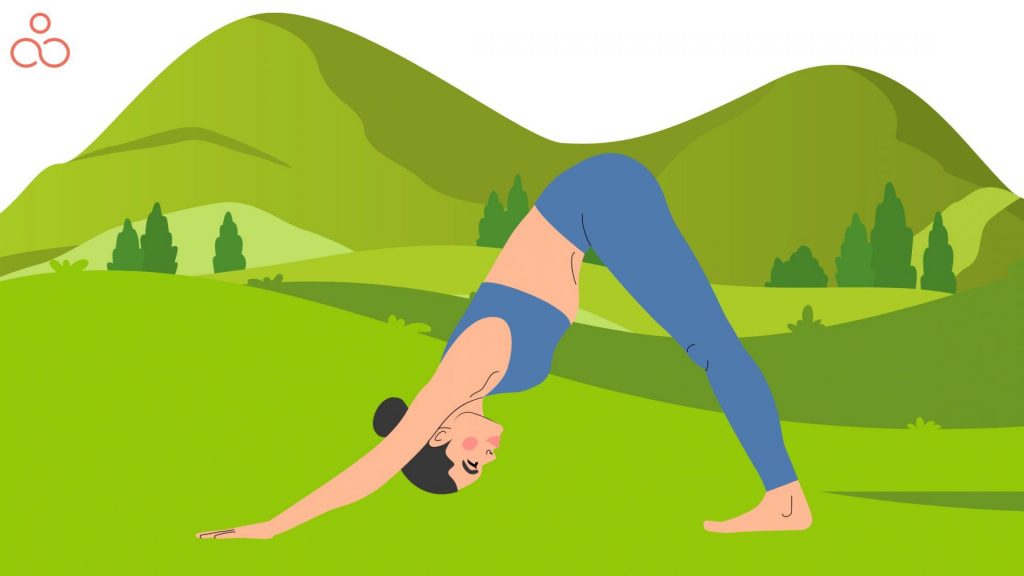
Adho Mukha Svanasana, Variation (Downward-Facing Dog Pose with Knee Taps): From the Tabletop, straighten your legs, tuck your toes, and roll your hips back to transition into a Down Dog. Move both hands 1 handprint forward on the mat. Take a deep breath and lift your left leg back. Bring your knee to your nose as you exhale, circle your back, and press your fingertips into the mat. Exhale while bringing your left knee outside of your left elbow. Inhale while straightening your left leg back. Exhale while bringing the left knee to the outside of your right elbow. Inhale while straightening the left leg back. three times in a row
Why it is ideal for climbers: The reason it’s perfect for climbers is that it develops your upper and lower body while also improving core stability and strength.
Anjaneyasana (Low Lunge): Push your foot forward while in Downward Dog, crossing your right knee across your right ankle. If you feel stable, you can raise your arms to the sky while bringing both palms to your right thigh and lowering your left knee to the floor. To activate the rear of your right leg and lengthen your spine, you should press your right leg into the ground. This will make you stand taller. To stabilize your backbend, keep working on your abdominals. ten breaths while holding. Continue on the opposite side.
Why it is ideal for climbers: Because it stretches your hamstrings, quads, and groin, this position is excellent for climbers. Additionally, it helps strengthen your knees and reduce hip stiffness.
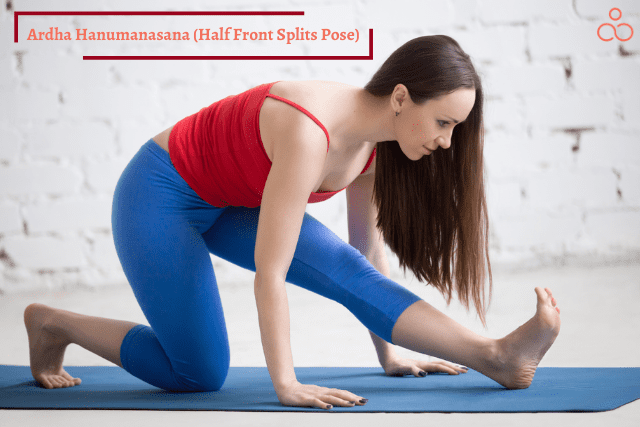
Ardha Hanumanasana (Half Monkey God Pose): From a Low Lunge position bring your palms onto the mat to place it on the outside of your leg. After taking a deep breath in, start straightening your front leg by lifting your toes off the floor and stretching them toward your face as you exhale. Ensure that your spine is long with each inhalation. Fold farther over your left leg with each exhalation. Ten breaths while holding. Repeat on the opposite side.
Why it is ideal for climbers: Your hamstrings, thighs, and groins are stretched in this position. It’s an excellent warm-up for a nice high foot!
Kapotasana (Pigeon Pose): Lay your shin over the mat while in Downward Dog while bringing your left knee to your left wrist. Your hips should be closer to the ground as you extend your right leg behind you with your toes out. Put a blanket, towel, or yoga block under your hip for support if your left glute is not lying flat on your mat. Take a deep breath in and walk your hands to your hips while expanding your chest. Walk your hands forward onto the mat as you exhale, then lower your forehead to rest it on your forearms to take support or on the mat. Hold for twenty breaths. Continue on the opposite side.
Why it is ideal for climbers: This posture stretches your glutes and hips, and it may be incredibly difficult to sit still in this position.
Agnistambhasana (Ankle-to-Knee Pose): Start in the staff pose, or Dandasana, with a tall spine and both legs, stretched forward in front of you. Place your right big toe over your left knee such that your shin is one on top of the other. Once your left shin is piled beneath your right and your knees are piled ankle to knee. Gently push your top knee down and lift your head towards the sky while keeping your fingers on the mat next to your hips and vigorously flexing both of your feet. Stay in this position and focus on your breathing, or if you want to go deeper, try walking your hands ahead of you and leaning forward beyond your legs while keeping the length of your spine. Hold for ten to twenty breaths. On the opposite side, repeat.
Why it’s ideal for climbers: If you fold forward, this position also extends your low back and outer hips.
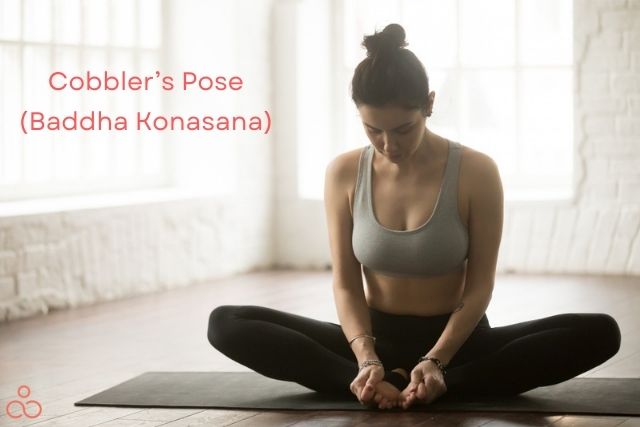
Baddha Konasana (Bound Angle Pose): Sit in Staff Pose to start. Next, lower your knees out to the sides, draw your heels into your pelvis, and allow the soles of your feet to softly separate as you bend your knees. Inhale to lift your chest up, lengthening your spine. Stay still or start to fold forward as you exhale, bringing the chin towards the ground. 20 breaths should be held.
Why it’s ideal for climbers: If you fold forward, this position also extends your lower back and inner thighs, groins, and knees.
Why should climbers practice yoga?
Your rock climbing experience will change if you include a few important yoga poses in your routine. Yoga is regularly practiced by climbers and has a variety of advantages. Yoga can help you become more flexible so you can maneuver complicated climbing moves with ease. It supports you in maintaining and controlling your breathing to enhance concentration under stress.
Additionally, practicing yoga can lead to increased flexibility, strength, and activation of the agonistic (active) and antagonistic (supporting/stretched) muscles (i.e., the bicep is agonistic when the triceps is antagonistic).
Yoga for mountain or rock climbing is a much-needed supplement to your regimen since the muscles you need to push yourself up the wall and maintain your position can truly take a beating. Yoga and rock climbing have a lot in common, both need a high level of concentration and balance, and they both help you improve agility and stimulate a wider motion range in your shoulder and hip joints through dynamic movement. Many rock climbers do yoga on their rest days and swear by it, but some yogis contend that because yoga focuses on flexibility and balance, it will only build you a stronger climber.
In reality, climbing more is the greatest method to improve and prepare for better climbing (this is called the principle of specificity).
10 Recovery Exercises in Yoga for Climbers
- Prone pose (1 – 5 minutes): Although it may not seem like much, the beginning in Prone Pose is a terrific method to relax your mind and give your body a rest after performing wall gymnastics. When you are ready to lay on your stomach, stack your hands to create a cushion and place your forehead on it. Put your eyes closed and take a couple of deep breaths, allowing your entire body to relax, particularly your jaw, abdominals, and glutes.
- Starfish (1-2 minutes each side): Pulling yourself up the wall puts a lot of strain on your biceps, which are difficult to stretch. However, this position gets surprisingly close while simultaneously targeting your chest by extending the pectoral muscles that attach your arms up to your chest. Your right hand should be about level with your shoulder as you extend your right arm wide out to the side, palm down. Keep your arm in place, rest your cheekbone on the ground, and then slowly turn over onto your right-hand side by pressing into your left hand. If you don’t get too far, don’t worry. Breathe normally and try to relax your jaw at this point. Before switching sides, take a few more breaths to rest on your abdomen.
- Wrist stretch (1 minute): Your wrists may be sore at the finish of the day from holding on to minuscule grips while maintaining your weight against the wall, in which case this strenuous stretch could be exactly what you need. In this posture, your thumb will be pointing out to three and nine o’clock and your palms will still be down but your fingertips will be pointing back towards your knees. Push oneself up to your hands and knees. Leaning backward will make the sensation more intense, and forwarding will make it less intense. Don’t clench your teeth or hold your breath throughout this.
- Toes pose (1-2 minutes): You may shake out your wrists while performing this strenuous stretch, which is helpful for a climber’s feet after being crammed into snug-fitting climbing shoes and clutching to narrow footholds. Sit back on your heels and tuck your toes beneath. If your knees are an issue, you can maintain a slight forward lean and keep your hands on the ground while gently pressing into them to extend your feet. If you can, lean back on your heels and allow your weight to drop to the ground to maximize the stretch. Your feet won’t likely appreciate it right away, but they will afterward. Remember to breathe!
- Thunderbolt (1-2 minutes): After the toes posture, extending your ankles in the other way is the greatest thing you can do, and this pose also helps to slightly stretch your quadriceps. Hang back on your heels and untuck your toes. If your knees require assistance, create a bit more room for your knee joints by inserting a pleated blanket or towel over your hamstrings and calves. You can gently recline and even elevate your knees to improve the flexibility in the front of the ankles.
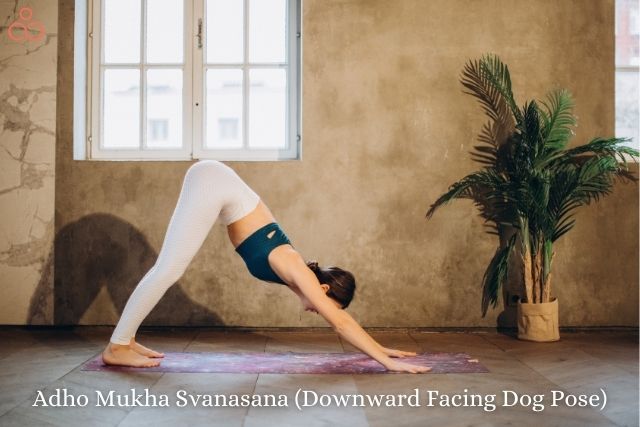
- Downward dog (1-2 minutes): Although the downward dog is a classic yoga posture, we’re including it since it’s a great method to extend your calves. You spend a lot of time on your tiptoes while climbing, which works your calf muscles hard. Return to your hands and knees, but this time, place your hands approximately one handprint forward of your shoulders rather than starting with them there. Curl your toes under, raise your knees, and begin to raise your hip toward the ceiling so that your body forms an upside-down V. Raise your seat bones up and back in a reverse way from your hands as you advance and lower your hands. Stretch your left leg while bending your right knee slightly. Repeat.
- Hand-to-foot pose (1-2 minutes): This posture extends your back muscles, which work the hardest while climbing, and provides your wrists with another excellent stretch, this time in the other direction. To transition into a standing forward bend, walk your feet over to your hands from downward dog. Here, you are free to make any knee flexion. Your toes should be on the heels of your hands as you slowly slip your hands, palms up, underneath your feet. Put your neck at ease and gently push down with your toes on your hands, as if you were playing the piano. To enhance the stretch, you can also pin your hand down with your foot and try to bring it up slowly.
- Side bend (30 seconds on each side): The large muscles that link your arms to your spine are called your lats, and they exert a lot of force as you pull yourself up, which is why you could experience armpit soreness after climbing. We don’t always do a great job of stretching these muscles, but a simple side bend while standing may help a lot. As you stand up and extend your arms above, let go of your hands from underneath your feet and take a deep breath. Until you feel a wonderful stretch along the left side of your body, clench your hands together, press your feet into the ground, and extend up and over to the right. Hold without putting too much stress on your spine for a few breaths, then switch sides.
- Low lunge (1-2 minutes each side): By the conclusion of a multi-pitch climb, your quadriceps on the front of your thighs may be trembling, whereas your hip flexor muscles on the front of your hips do most of the effort of finding solid footholds and perfecting your heel hooks. To reach your fingertips to the ground following your side bend, bend your knees however much you like. Lunge forward with your right foot and lower your left knee. You will begin to feel stretching on the front of your left hip and thigh as you slip your left knee back and provide space for your hips to slightly sink forward and downward. To help with the stretch, you can maintain your fingertips flat on the pavement or raise your hands upwards to your low back. Put your left foot forward more to your hands when you’re ready, then step your right leg back to switch sides.
- Reclining pigeon (2-3 minutes each side): This posture is a favorite among climbers because it gives your outer hips’ glute muscles, which work hard to lift you and may be challenging to extend, a juicy stretch. Kneel on your back with both of your knees bent. Draw your legs a little closer to you by crossing your right ankle over your left knee, then reach your hands through to grab the back of your left thigh. To expand the sensation in your right hip out across a larger region, gently sway your right shin from side to side while using your hands and left leg to move your right shin closer to your chest. Change sides when you’re prepared, then take a few minutes to relax on your back.
FAQS
Does yoga benefit climbers?
Yoga enables you to discover your centre of gravity, which is important for rock climbing and connects your body and mind. When you are searching for the next footing, having a feeling of where you are in space and how your body functions may be really helpful.
Does yoga work better before or after climbing?
Yoga often emphasizes paying attention to your body and being in the present. But after climbing, this is even more crucial because the body is already warmed up and some stretches will come naturally—sometimes too naturally.
Which muscles are more utilized during climbing?
Leg muscles: The quadriceps muscle in particular provides the main climbing strength. The hamstrings, gluteal, and calf muscles are additional crucial muscles. Rotator cuff and deltoid muscles of the shoulder. Pectoralis major (smaller function), latissimus dorsi, and rhomboids are the muscles of the torso.
Do you need to warm up before climbing?
Your body’s tight muscles need to be stretched to develop flexibility and prevent damage. Before climbing, stretching should always be dynamic. Stretching, however, can be both static and dynamic at any other moment.
Conclusion
Yoga positions and breathing exercises are extremely helpful for rock climbers. A strong core, powerful shoulders, tight calves and hamstrings, a sensation of excellent balance, and a larger lung capacity are all facilitated by the postures. By increasing oxygen intake during yoga sessions, the body can expel harmful pollutants. Maintaining energy levels results in the proper muscles being toned, increasing strength and flexibility.
