Medically reviewed by Dr. Mishra
Have you ever tried to suppress your urge to look at someone practicing Yoga? It is so beautiful to see the body flowing into a series of poses as smoothly as possible, just like water taking the shape of a container. But it is not as easy as it appears. Years of practice lead to the right balance and perfection. Fear of embarrassment stops many people from joining a Yoga class. Practicing a few Yoga beginners poses helps you tune your body and build confidence. Our Orthopedic Doctor says numerous poses are beginner-friendly, safe, and easy to perform without injuring yourself. Continue to read to check out the recommended Yoga Beginner Poses.
Important Asanas For Beginners And Words Of Caution!
Yoga isn’t challenging to perform, but it is essential to do it the right way. Keep things simple when you start. Every morning when you get up and do some stretching, unknowingly, you are already doing half of it. Just pay attention to your alignment. Should it be painful performing them, stop immediately and get medical advice. Focus on how you should breathe while performing the asanas. Always check with your doctor before trying specific asanas to understand your medical condition. Don’t overdo it if it is getting painful, just stop and don’t blame yourself for not being flexible enough right now. “What does not kill you makes you stronger” is not an advisable approach when it comes to muscles and bones. Training the muscles makes them stronger, but overdoing it may cause muscle tear and inflammation of the tendons requiring a longer painful healing process and relaxation time, thereby as an end-effect detracking your motivation to learn the asanas. There will be a certain level of discomfort in certain Asanas, but it should be manageable with practice. The key to Yoga is to listen to your body!
The Yoga poses can broadly be classified into the following categories:
- Standing Poses – This category is preferably done at the beginning of the exercise to warm up the body and prepare for other poses. In Yoga forms like Vinyasa Flow, these standing poses are even grouped to form a sequence.
- Balancing Poses – Balance is the key to mastering Yoga and can be achieved only with regular practice. The balancing poses to improve the core strength of the body and help in focus and concentration. Try to lock your eyes on a fixed point, which is unmoving. It will be easier to keep your balance.
- Backbends – In our daily life, we hardly work on strengthening the back or practice backbends which impacts our health in the long run. It is important to practice gentle flexion and extension of the back for spinal health and longevity.
- Seated Poses – In contrast to the standing poses, the seated poses are preferably done at the end of an exercise session. This way, the body is sufficiently warmed up to flex without straining the hamstrings, hips, and spine. On a lighter note, it is even comfortable to sit and stretch after a tiring session of poses.
- Resting or Supine Poses – The important of all categories are the resting poses as they help your body relax and make the most of all the other poses. These poses also help soothe your mind and bring a calming effect on the body.
An assortment of the groups mentioned above, as recommended by our Orthopedic doctor for the newbie yogis, are listed here. Each of these poses helps relieve stress and stretch different muscle groups in the body.
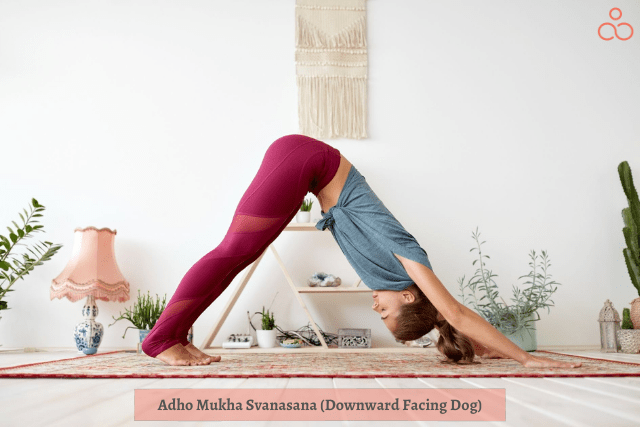
- Adho Mukha Svanasana, or Downward Facing Dog Pose – This forward bending pose helps stretch the hands, shoulders, hamstring, and calf. It lengthens the spine and strengthens the arms, legs, and back.
Do it: If you wish to ease your backache due to spinal stenosis, to increase blood circulation throughout the body.
Skip it: If you get dizzy very easily, suffer from severe hypertension.
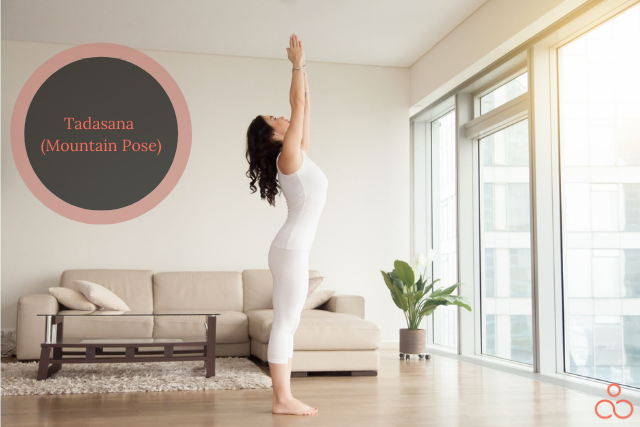
- Tadasana or Mountain Pose – This is a standing pose and is also referred to as samasthiti. It is a modern Yoga pose that is not described in the medieval Hatha Yoga texts. It is a preparatory pose for all the other standing poses. It strengthens the knees, thighs, and ankles. It helps to correct your posture and brings more balance to the body.
Do it: If you want to strengthen the muscles of your legs and thighs.
Skip it: Reduce the duration if you have Hip / Knee Arthritis. Otherwise, there is no reason to skip it.
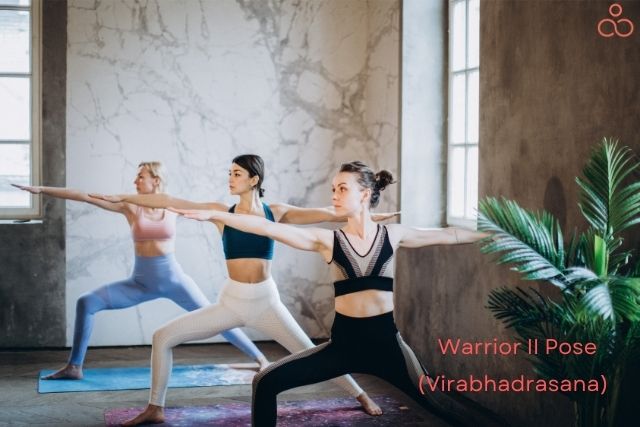
- Virabhadrasana or Warrior II Pose – This is a standing pose and is the second in the set of three warrior pose variations. Regular practice of this asana enhances strength, stability, and concentration. This pose is named after Virabhadra – an incarnation of Lord Shiva and a warrior in Hindu mythology. It strengthens the legs and ankles while stretching the shoulders, chest, groins, lungs, and thorax.
Do it: If you wan to improve physical balance and concentration.
Skip it: If you have the risk of falling, Vertigo, Dizziness.
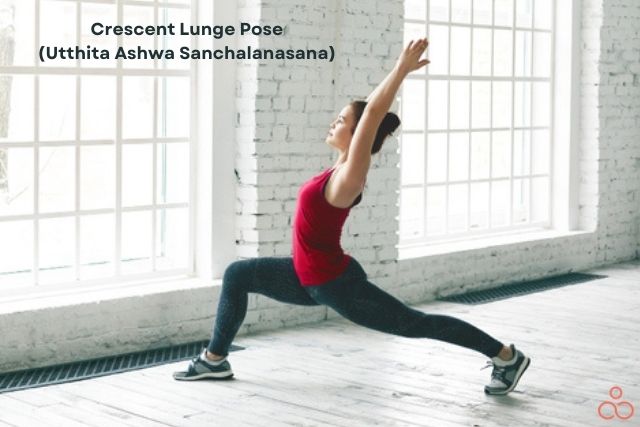
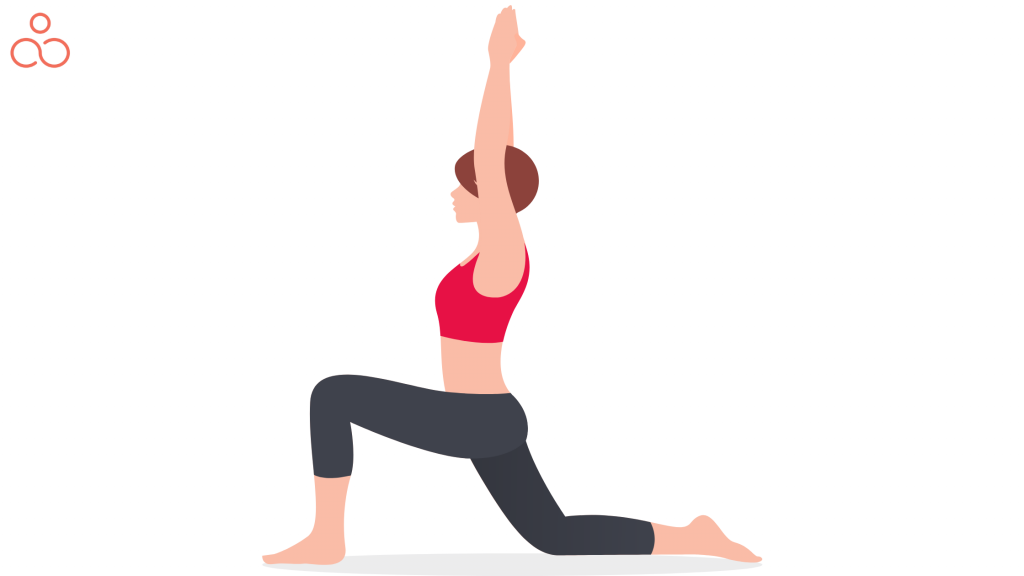
- Utthita Ashwa Sanchalanasana or Crescent Lunge – This is a standing pose and is one of the 12 poses in the sequence of Surya Namaskar or Sun Salutation. It is a part of Hatha Yoga and helps strengthen the legs and arms. It focuses on lengthening and stretching the spine. Experts say it is more important to keep your spine long than to worry about keeping it straight.
Do it: If you wish to strengthen the muscles of your legs and thighs.
Skip it: Reduce the duration if you have Hip / Knee Arthritis. Otherwise, no reason to skip it.
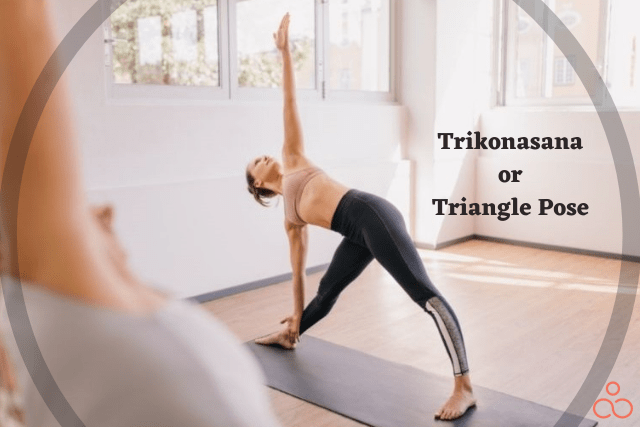
- Trikonasana or Triangle Pose – This is a standing pose that helps strengthen the knees, thighs, and ankles. It also helps in improving flexibility and opening the chest and shoulders. It is fun to do this asana and is even included in Yoga for Kids.
Do it: Stretch and strenghten the Hamstrings and Groin.
Skip it: If you have Back Conditions, twisting movement can worsen the Vertebral Disc Herniation.
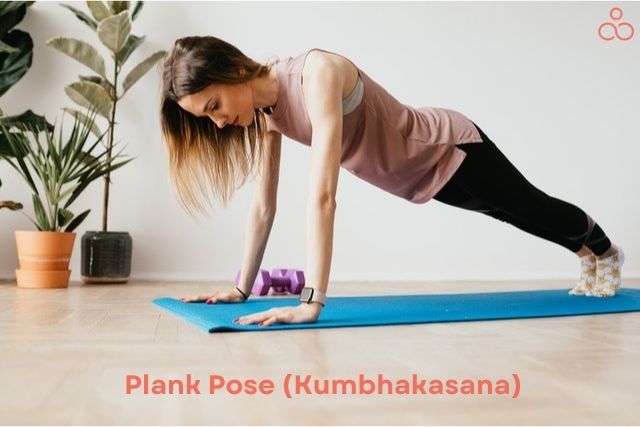
- Kumbhakasana or Plank Pose – This is a prone pose and is commonly used in the dynamic sequences of the upper body. This must-do pose improves your core strength and tones your abdomen muscles for a flat belly.
Do it: Improves focus and concentration.
Skip it: if you suffer from Carpal Tunnel Syndrome, Arthritis of the Wrist joint.
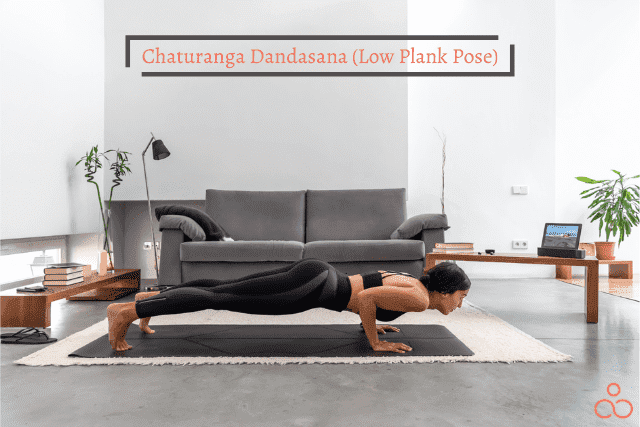
- Chaturanga Dandasana or Low Plank Pose – This is a prone pose and is also called the Four-Limbed Staff Pose. This is a preparatory pose for more challenging balancing poses. It strengthens the arms, wrists, abdominal, and spinal muscles. This pose could be slightly difficult for a beginner, yet it is doable.
Do it: Improves focus and concentration and strengthens the muscles of the arms and legs.
Skip it: If you suffer from Carpal Tunnel Syndrome, Arthritis of the wrist joint, and shoulder pain.
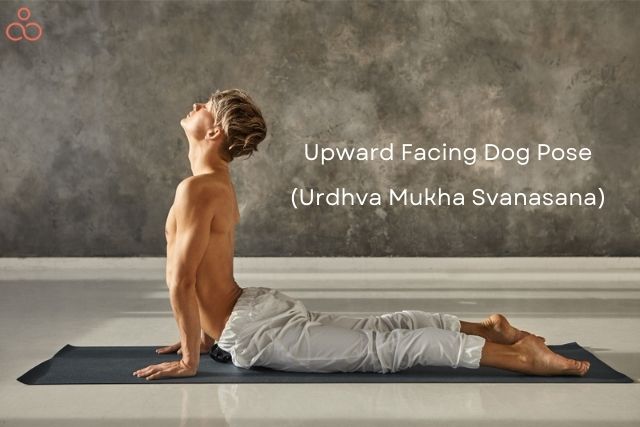
- Urdhva Mukha Svanasana or Upward Facing Dog Pose – This is a back-bending asana and is a part of the Surya Namaskar or Sun Salutation Sequence. It helps strengthen the vertebral column and stretches the thorax, shoulders, lungs, and abdomen.
Do it: If you want to increase flexibility in the back muscles.
Skip it: In cases of spinal canal stenosis.
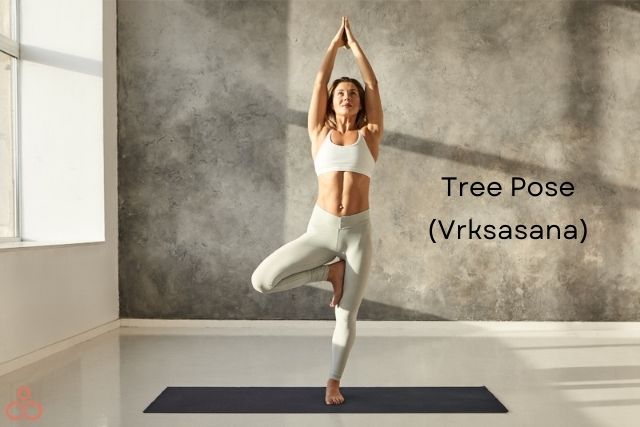
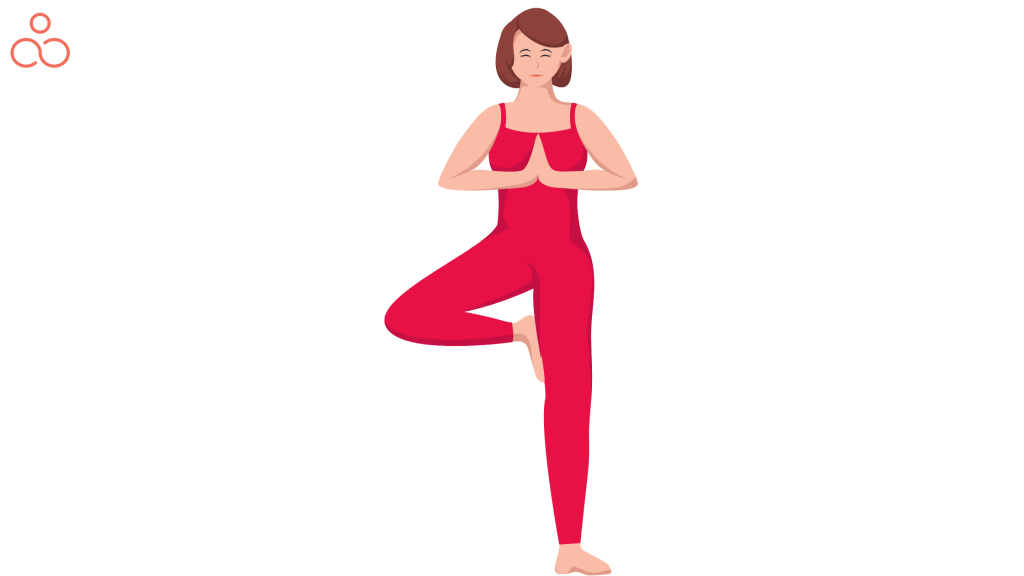
- Vrksasana or Tree Pose – This is a standing pose and helps improve the overall body strength. It works on enhancing body balance. Do not strain to lift your leg up to your inner thigh if you find it difficult to balance or to experience any pain as a beginner. Take a lesser bend and try to improve with practice.
Do it: If you wish to increase your strength and balance in the legs, it will help you feel centered, steady, and grounded.
Skip it: In the case of Hip Joint Arthritis.
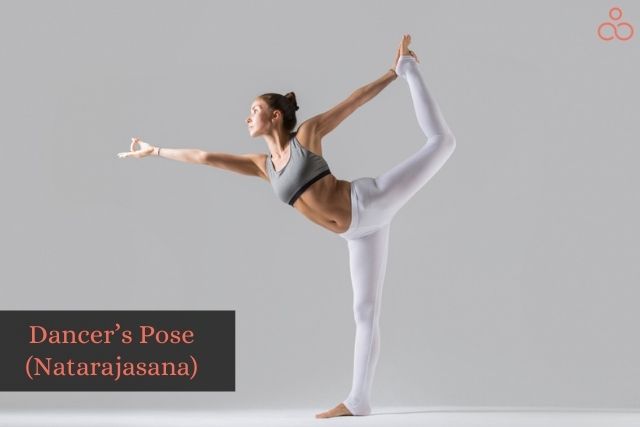
- Natarajasana or Dancer’s Pose – This is a blend of standing, balancing, and back bending asanas commonly used in modern Yoga. It strengthens the legs and ankles. It opens the chest and stretches the abdominal region. A slightly difficult asana for a beginner but can be achieved if you try after practicing the other standing poses for the right balance.
Do it: If you wan to improve body balance and strengthen legs and ankles.
Skip it: In the case of severe back pain, high blood pressure, hernia, or vertigo.

- Ardha Kapotasana or Half Pigeon Pose – This is a seated backbend pose that helps stretch the entire front body. It improves the posture, strengthens the spine, and stimulates the organs in the neck and abdomen.
Do it: If you want more flexibility in the hips and legs.
Skip it: Should you suffer from any kind of knee or hip injury.
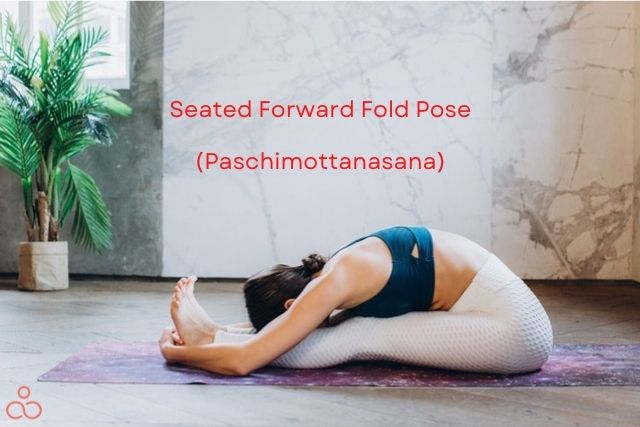
- Paschimottanasana or Seated Forward Fold Pose – This is a seated pose that helps in stretching the back and hamstrings. If practiced regularly, you could even notice a calming effect on your mind and thoughts. Allow yourself a gentle bend in the knees to keep the pose simple and manageable, to begin with. Use a scarf or towel if you find it difficult to bend.
Do it: If you want to increase flexibility in the spine.
Skip it: In the case of Pregnancy, Slipped Disc, Asthma.
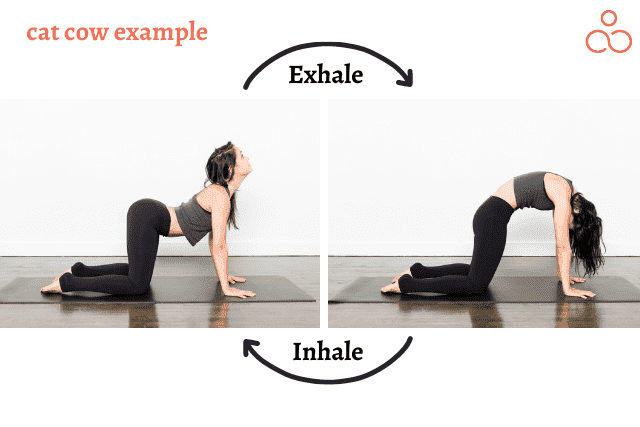
- Chakravakasana or Cat-Cow Stretch – This is a back-bending pose and works as a preparatory asana for a downward-facing dog pose. It targets the core body without extra stress on the wrists and shoulders. The pose’s gentle flexion and extension sequence help stretch the spine and strengthen the muscles around it.
Do it: If you want to improve posture, balance, and strengthen the spine
Skip it: In the case of weak wrists, shoulder injuries, knee injuries, or if you are pregnant.
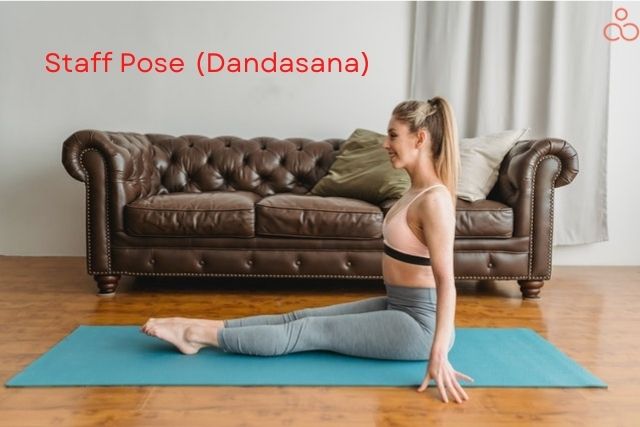
- Dandasana or Staff Pose – This is a seated pose and helps strengthen the back muscles. It improves your body posture and stretches the shoulders and chest. It helps restore flexibility in the body.
Do it: If you want to restore flexibility and improve posture.
Skip it: In the case of spinal injuries, neck injuries, or chronic back pain.
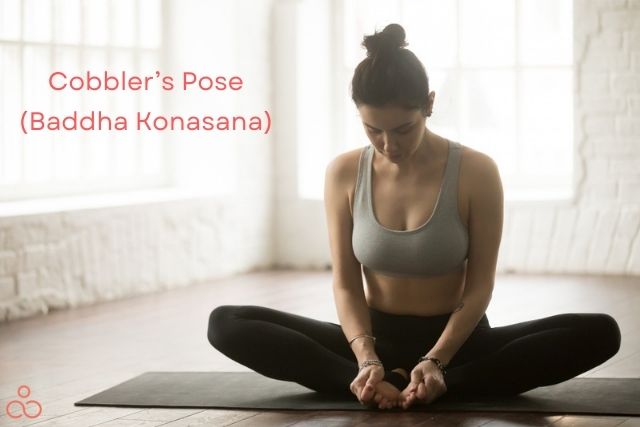
- Baddha Konasana or Cobbler’s Pose – This is a seated pose and is practiced in Hatha Yoga. It opens the hips and counteracts the effects of sitting for longer durations on the hip muscles. If you find it challenging to achieve this pose, use a soft pillow or blanket as support to elevate the hips caused due to stiffness in the hips or hamstrings.
Do it: If you want to strengthen the back and improve flexibility in the inner thighs, groins, and knees.
Skip it: In the case of knee injuries or groin injuries.
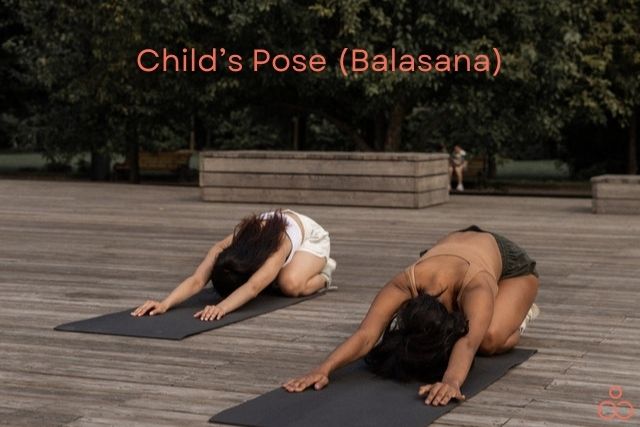
- Balasana or Child’s Pose – This is a resting pose commonly used at the end of the Yoga practice or during breaks during work and classes. It stretches the back, thighs, hips, and ankles. It relaxes the nervous system.
Do it: If you want to stretch your neck, spine, and hips.
Skip it: In the case of knee injuries, ankle issues, high blood pressure, or if you are pregnant.
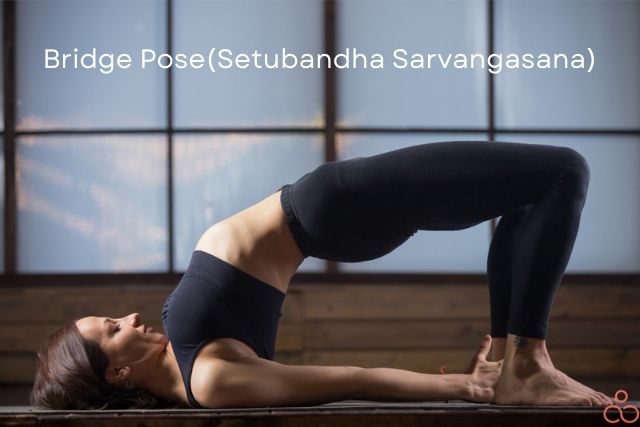
- Setu bandha Sarvangasana or Bridge Pose – This is an inverted back-bending pose and is practiced in Hatha Yoga and Modern Yoga. It strengthens the core body and improves the flexibility of the spine. And it stretches the vertebral column, neck, and shoulders. Bhujangasana is a follow-up pose for a perfect spinal stretch.
Do it: If you want to stretch your upper chest.
Skip it: In the case of neck injuries.
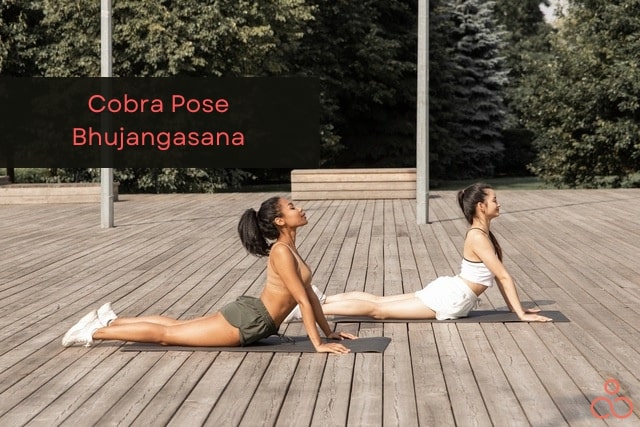
- Bhujangasana or Cobra Pose – This is a reclining back-bending pose and is a part of the Surya Namaskar or Sun Salutation sequence. It strengthens the vertebral column and stretches the shoulder, thorax, lungs, and abdomen. It opens the chest and relieves stress and fatigue.
Do it: In order to strengthen the spine.
Skip it: Should you suffer from arthritis, carpal tunnel syndrome, or lower back injury.
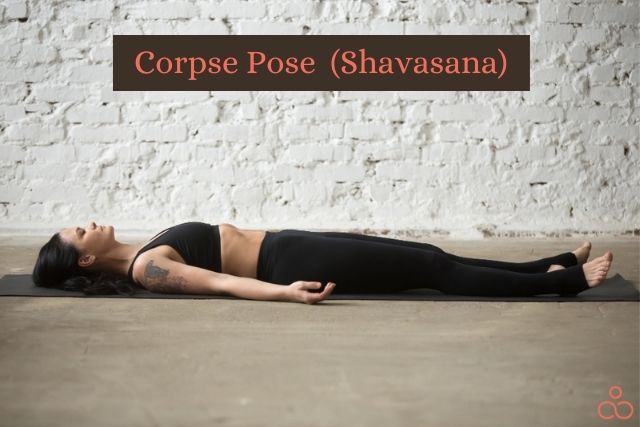
- Shavasana or Corpse Pose – This is a resting pose and the commonly underrated asana. Did you ever wonder why Yogis are so cool? Try this asana! It works at a different level. Looks simple yet has a significant impact on the body physically and mentally. Do check out the complete article on Shavasana here.
Do it: Always!
Skip it: If you don’t wish to have mental calmness.
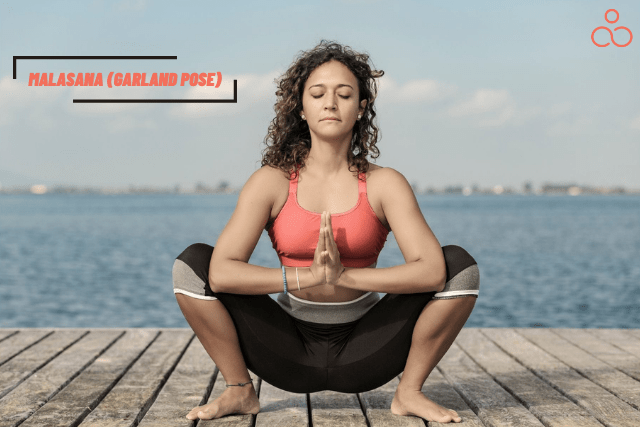
- Malasana or Garland Pose – This is a squatting pose commonly practiced in Hatha Yoga, Iyengar yoga, and even Modern Yoga exercises. It is a natural pose for children, but adults find it difficult. It is a great pose for the hips and counteracts the effect of too much sitting in the current day sedentary lifestyle. It stretches the back torso, stimulates the pelvic muscles, and strengthens the calf muscles.
Do it: If you want to improve balance, focus, and regulate sexual energy.
Skip it: In the case of knee injuries, ankle injuries, or if you are pregnant.
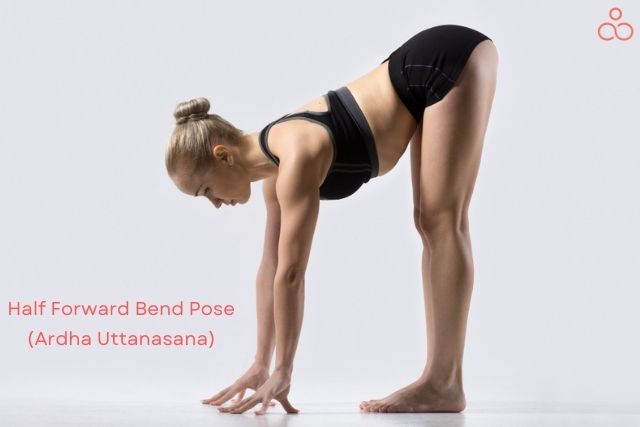
- Ardha Uttanasana or Half Forward Bend Pose – This is a standing pose that strengthens the back. It is a spine lengthening posture that improves flexibility. It works as a preparatory pose for challenging poses where you can’t touch your toes. It stimulates abdominal organs and helps improve digestion.
Do it: to strengthen the spine, hip, hamstrings, glutes, and core muscles.
Skip it: In case of hamstring and lower back injuries, weak joints, or if you are pregnant.
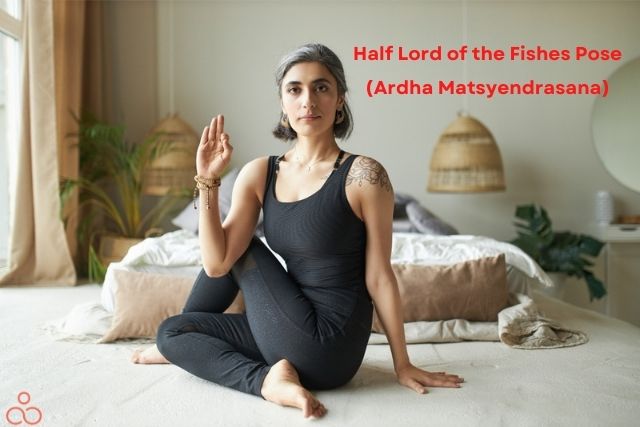
- Ardha Matsyendrasana or Half Lord of the Fishes Pose – This is a seated twist pose practiced in Hatha Yoga. It stretches the shoulder, neck, spine, and hip. It stimulates the abdominal muscles, liver, and kidneys.
Do it: In order to strengthen, stretch, and rejuvenate the back and spine.
Skip it: In the case of spinal injuries and heart, abdominal or brain surgeries.
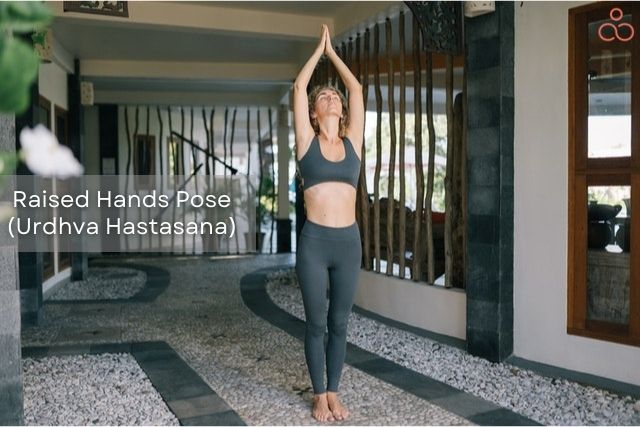
- Urdhva Hastasana or Raised Hands Pose – This is a standing pose and can be considered a basic morning stretch. While performing this asana, focus on the alignment established in mountain pose. It stretches the shoulder and navel. It stimulates the heart chakra.
Do it: If you want to stretch and tone, improve digestion and relieve anxiety.
Skip it: In the case of neck or shoulder injuries, back pain, or asthma.
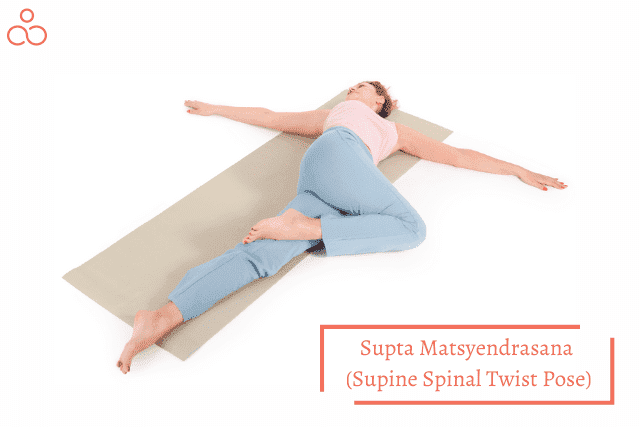
- Supta Matsyendrasana or Supine Spinal Twist Pose – This is a twisted supine pose that improves spinal mobility. It stretches the glutes, chest, spine, shoulders, thighs, obliques, and neck. It helps ease the back and neck tension. It stimulates the detoxification process of the internal organs of the body.
Do it: If you want to improve spinal mobility and aid digestion.
Skip it: In the case of the knee, hip, or back injuries.
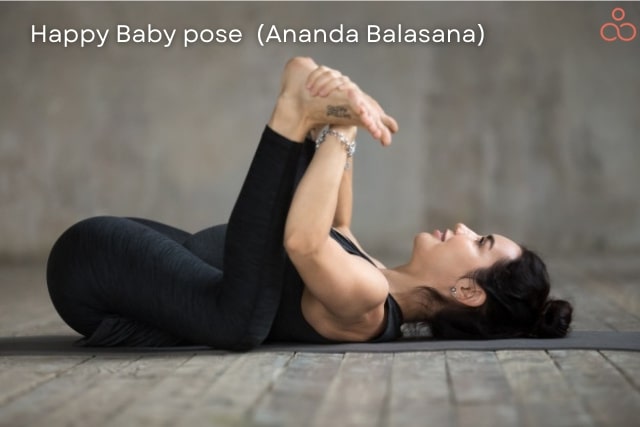
- Ananda Balasana or Happy Baby Pose – This is a resting pose commonly practiced in stretching exercises in Yoga and Pilates. It helps improve flexibility and mobility in the body. It stretches the inner thighs, spine, groin, and hamstrings.
Do it: If you want to relieve lower back pain and alleviate stress and fatigue.
Skip it: In the case of neck or back injury, or if you are pregnant.
Interesting Tips for Yoga Beginner Poses
- Be honest with yourself. Yoga might not be the form of exercise you are seeking. Give it a try! If you like it, make sure to do it as often as you feel comfortable. Yoga will show its fruits after some time. The consistent practice of the poses will help you improve in an overall perspective, both physically and emotionally, enabling you to excel on all fronts of life.
- As a beginner, you might find it challenging to decide which type of Yoga you would like to adopt as there are quite a few variations like Iyengar Yoga, Hatha Yoga, Ashtanga Yoga, Vinyasa, and much more. We wouldn’t recommend you start with Hot Yoga because, as a beginner, your body isn’t ready for the postures. Imagine dealing with the heat, and you might feel dizzy too. Hatha Yoga is slower than other forms, especially compared to vinyasa flow. So, as a starter, your body can get used to the movements comfortably with Hatha Yoga. Although there are also slower Vinyasa Yoga classes, it depends on the teacher you choose.
- It is quite challenging and often intimidating to lose balance while trying the asanas. Remember, there is nothing wrong, and nobody is born a master of Yoga. The secret to balance lies in your eyes. Try to focus on an unmoving point straight at a distance or on the floor, as it will help you attain the necessary balance for your practice.
- Always go for a free trial class before you sign up for it. You might end up losing money and not enjoy it at all.
- Don’t be ashamed of your body because almost no one is happy in his body. Go ahead and pick up some form-fitting clothes which make you twist and bend in any pose. We would recommend wearing tight-fitting clothes because wearing loose or baggy clothes, the teacher might not be able to correct you if you are not doing it right. Nonetheless, don’t squeeze in extremely tight clothes that make you feel uncomfortable even before starting your practice.
- You will sweat while doing Yoga. Remember to carry water with you.
- You might fart due to the bending and stretching. Let’s hope no one notices it was you. If it was too loud, apologize and continue.
- Keep breathing normally. It might sound weird as you ask, “How did you think I would forget to breathe?” But it’s from personal experience, that we might tend to slow down the pace of breathing or even hold our breath more often.
- Make sure your Yoga pants are non-see-through to avoid peek-a-boos and camel toes. Check out these Yoga Pants, we are sure you would enjoy your workout sessions in them!
Conclusion
After you become comfortable with Yoga, we are sure you will enjoy it and make it a part of your daily routine. Don’t have irrational expectations from yourself. You are doing it for the first time. It is okay if you can’t do specific postures, believe you will over time. And remember, every Master was a beginner once, who hasn’t given up!
